Orologio

Visualizzazione post con etichetta dolci. Mostra tutti i post

martedì 10 giugno 2014

Mekong Delta - Floating Market and vietnamese local products


Visitando il Delta del Mekong giungiamo alla fine del nostro viaggio in Vietnam, forse il paese che, fino a questo momento, ci ha entusiasmati maggiormente e che abbiamo avuto modo di esplorare più a fondo.

Il Delta del Mekong è conosciuto soprattutto per un piccolo villaggio, noto per i suoi mercanti galleggianti. Questi, a differenza di quelli che potreste trovare a Bangkok, non sono affatto turistici, ma esclusivamente riservati alla popolazione locale.
Attraverso un giro in barca, abbiamo avuto occasione di guardare da vicino questo mercato e rimanerne affascinati.

venerdì 28 febbraio 2014

Arriva il Carnevale . . . Arrivano le Sfrappole ! - Mardi Gras is coming . . . It's time for Sfrappole !

Il Carnevale è da sempre un'ottima scusa per potersi concedere dolci di ogni genere. Quelle che, però, preferisco tra tutte le delizie carnevalesche sono sicuramente le Sfrappole. Frappe, Chiacchiere, Cenci . . . tanti nomi per descrivere una sola strepitosa ricetta.
Quella che ho deciso di proporvi oggi si basa direttamente sulla ricetta di mia nonna Edda. Ho provato più volte a mangiarne altre, ma nessuna frappa è buona come quelle che fa lei - ovviamente è una cosa che tutte le nipoti dicono delle proprie nonne . . . ma vi assicuro che sono favolose, come del resto tutta la sua cucina.
 
Procediamo dunque !
 
Ingredienti per un bel vassoio (circa 10 persone)
 
- 500 g di farina 00
- 50 g di zucchero
- 2 uova
- 150 ml di arancia spremuta e filtrata
- Olio di semi per friggere
- Zucchero a velo
 
Preparazione
 
Setacciamo la farina e disponiamola insieme allo zucchero a fontana su un piano da lavoro. Rompiamo poi le due uova al centro della fontana, il succo d'arancia e mescoliamo ed impastiamo bene il tutto fino a quando non otterremo una pasta compatta ed elastica.
Formiamone una palla, copriamola nella pellicola trasparente e la facciamo riposare in frigo per una mezz'oretta circa.
Passato questo tempo, tiriamo fuori la pasta dal frigo e cominciamo a stenderla a - mattarello o con la macchina apposita, come ci trovate meglio ! L'importante è che alla fine ne risulti una sfoglia sottilissima (vale sempre la regola del guardare contro luce, dovrà risultare praticamente trasparente).
Una volta stesa bene tutta la pasta, prendiamo un tagliapasta ondulato e ricaviamo delle strisce lunghe una decina di cm e larghe circa cinque.
Come avremo tagliato tutta la pasta, cominciamo a friggere ogni striscia di pasta (leggermente infarinata) in un pentolino con l'olio bollente. Consiglio di friggerne una alla volta. Ogni pezzo sarà pronto quando sarà appena dorato.
Quando avremo fritto tutte le Sfrappole, è molto importante tamponarle bene bene con della carta da cucina, per evitare che siano troppo unte.
Mettiamole quindi su un bel vassoio e passiamo una bella spolverata abbondante di zucchero a velo e . . . ecco pronte le nostre Sfrappole !


Le Sfrappole dovranno essere molto friabili e croccanti. Sono deliziose dopo pasto ma anche semplicemente per merenda.
 
Che dire . . . meno male che c'è la nonna che ci vizia con queste delizie !

Alla prossima
Beatrice B.
 
Mardi Gras is always a good chance to eat all kinds of sweets and confectioneries. But the ones which I definitely prefer above all these delights are "Sfrappole". You can call them in several ways: Frappe, Chiacchiere, Cenci. . . different names to describe one amazing recipe only.Today, I've decided to show you the original recipe of Sfrappole by my Grandmother EddaBelieve me . . . there's no Sfrappola good as the ones that she cooks.

The recipe is the following
 
 Ingredients for about 10 people
 
- 500 g of white flour 00
- 50 g of white sugar- 2 eggs
- 150 ml of orange juice
- Oil for frying
- Icing Sugar
 
Preparing

Put flour and sugar together on a worktable and make a well in the centre of the flour and break the eggs inside. Pour the orange juice  as well and mix everything. Knead it all until you get an elastic mixture.
Roll the pasta in the cling film and let it rest in the fridge for about half an hour.After this time, Take the pasta out from the fridge and start to roll it - you can use a rolling pin or the appropriate machine, as you prefer ! The important thing is that, in the end, the result must be very very thin.
Once you have stretched well all the pasta, let's take a pastry cutter and cut it in order to get strips about 10 cm long and 5 cm large.
As you have cut all the dough, start to fry each strip ( lightly floured ) in a pan with hot oil. I suggest to fry just one strip per time. Each piece will be ready as it starts to get golden.When you will have fried all the Sfrappole, it is very important todry them with kitchen paper, in order to avoid the Sfrappole to be too oily.Then, put them on a pretty dish and sprinkle some icing sugar on the top, and . . . Mardi Gras' Sfrappole are ready !
 
Sfrappole will have to be very crumbly and crunchy. They are delicious after a meal as dessert, but also just for a snack.
 
What can I say . . . Thanks to God, there's Granny, who spoils us with these delights!

Stay Tuned
Beatrice B.
 

martedì 25 febbraio 2014

Cantine “Al Rocol”: Una Domenica al gusto di Franciacorta – “Al Rocol” Winery: the flavour of the real “Franciacorta”

Chiedo innanzitutto scusa per la mia assenza dal Blog della scorsa settimana . . . ma la Laurea si avvicina e, oltre all’emozione, cresce anche il lavoro da fare ! Se non altro, il materiale di cui parlare si accumula sempre di più !

Vorrei cominciare con lo scrivere di una splendida giornata, purtroppo rimasta nel cassetto per 15 giorni a causa di impegni vari. Il giorno del mio ritorno in Italia, infatti, io e i miei genitori abbiamo approfittato del mio arrivo a Bergamo per visitare una deliziosa cantina nella zona del Franciacorta, in particolare ad Ome, in provincia di Brescia: le Cantine Al Rocol.

Davanti ai nostri occhi si presenta il tipico agriturismo, immerso nel verde e nelle colline, nonché qualche dolce cerbiatto e simpatici coniglietti che ci guardano incuriositi.


L’azienda è a gestione famigliare. Gianluigi e Francesca Vimercati Castellini conducono con successo non solo la produzione e la vendita dei vini, ma anche un favoloso ristorante, caratterizzato da una buonissima cucina casereccia, delle camere e una fattoria didattica.

La nostra gita comincia, dunque, con una visita guidata all’interno della cantina. La guida ci ha fatto strada all’interno del luogo, attraverso una dettagliata spiegazione di tutto il processo di produzione dei quattro diversi tipi di Franciacorta che questa cantina propone: Pas dosé; Brut millesimato; Satèn millesimato e Rosè. Si conta anche un’ampia produzione di altri vini D.O.C. e I.G.T.
I vini vengono venduti direttamente dall’azienda, senza alcun tipo di intermediario. Ciò permette, innanzitutto, di mantenere un contatto diretto con il cliente, garantendone la qualità e l’originalità, senza incidere in alcun modo sul numero di vendite.
Sbalorditiva quella che è stata già definita come una “viticultura eroica”, per il fatto che l’azienda utilizza uve provenienti da vigneti terrazzati.
Ciò che mi ha colpito maggiormente della cantina è stato il fatto che il remuage delle bottiglie (un’infinità vi assicuro) veniva fatto completamente a mano per 20 giorni, 4 volte al giorno ! !
 
Mia mamma davanti all'ingresso della cantina.
My mum, at the entrance of the winery.


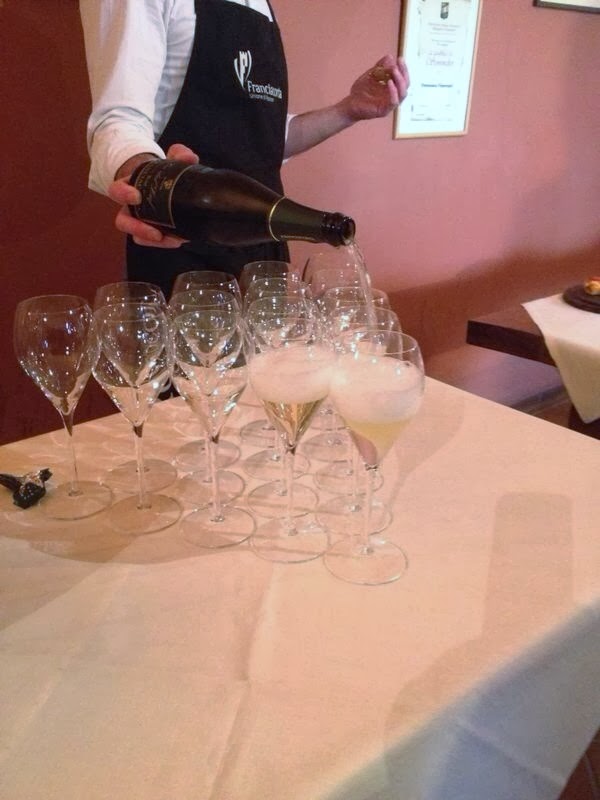
Al termine della visita, una frizzante degustazione, accompagnata da stuzzichini tipici del luogo, ci ha permesso di scoprire al meglio i diversi sapori nati e prodotti in questa zona.


Direi che papà ha gradito.
Apparently, daddy has appreciated that.

Il nostro viaggio di sapori continua nella cucina, dove ci aspetta un pranzo a dir poco delizioso. I piatti della tradizione bresciana cucinati con passione da mamma Daniela ci hanno conquistati.
Fortemente indecisi tra le portate da scegliere, abbiamo deciso di concederci un tris di primi: tagliatelle di castagna con gorgonzola e noci; casonsèi (una sorta di raviolo tipico del luogo) ripieni di bagòss (un formaggio della zona) e bigoli con guanciale e pecorino.
Siamo poi passati ai secondi con una fantastica grigliata mista, asinello con polenta e il famosissimo manzo all’olio. Tutto strepitoso.
Siccome  poi non ne avevamo ancora avuto abbastanza . . . ci siamo concessi anche il dolce. Le crostate fatte in casa accompagnate da un delizioso zabaione casalingo, ci hanno infine saziati del tutto.

Tagliatelle di castagne con crema di gorgonzola e noci.
Chestnuts Tagliadelle with gorgonzola cream and nuts.

Casonsèi con ripieno di bagòss.
Casoncelli filled with bagòss cheese.

Bigoli con guanciale e pecorino.
Bigoli with lard and pecorino cheese.

Asino e polenta.
Donkey and polenta.

Manzo all'olio.
Beef in oil.

Crostata alle ciliegie.
Cherries pie.

Abbiamo salutato “Al Rocol” acquistando qualche bottiglia e con la pancia e il palato più che soddisfatti! Un'esperienza semplicemente deliziosa, oltre che molto interessante.
Ecco, di seguito, i contatti.

Agriturismo Al Rocol
Via Provinciale 79 - 25050 Ome (BS)
Tel/Fax 030.6852542 - info@alrocol.com
http://www.alrocol.com

La nostra gita, però, non finisce qui. Abbiamo infatti approfittato della splendida giornata di sole per fare un breve giretto ad Iseo, sulle rive del famoso Lago, dove non avevo ancora avuto occasione di andare. Per chi lo desidera, è possibile inoltre fare un giro del lago in traghetto e fare sosta presso la più grande isola lacustre d'Europa: Monte Isola.


Alla prossima
Beatrice B. 

At first, I want to apologize for my absence from the blog of last week . . . but the graduation day is  coming soon and, as well as the emotion is increasing, so does the work which I have to do!  At least, everyday I collect a lot of material to write about !

Let me begin with the writing about a wonderful day, which has unfortunately been in the drawer for about 15 days, due to various commitments. The day when I came back to Italy, in fact, my parents and I took the chance of my arrival in Bergamo to visit a lovely winery in the area of ​​Franciacorta, in particular in Ome, in the province of Brescia: the canteen "Al Rocol".

We discovered an amazing place,  like a typical farmhouse, surrounded by green woods and hills, with some sweet and cute bunnies and fawns, that were looking at us curiously.

The company is a family business. Gianluigi and Francesca Vimercati Castellini lead  the production and the sale of wines successfully, but also a fabulous restaurant offering a delicious home-cooked food , some rooms and a didactic zoo.

Our tour began with a guided tour of the winery. We had the chance  to discover this lovely place through a truly interesting and detailed explanation of the entire production's process of the four different types of Franciacorta which this winery offers: Pas dosé; Brut millesimé; Satèn millesimé and Rosé. It also has a large production of other wines DOC and I.G.T.
The wines are directly sold by the company, without any intermediary. This allows to maintain a direct contact with the customers, ensuring quality and originality.
It's also incredible what it has already been defined as a "heroic viticulture", due to the fact that the company uses grapes from terraced vineyards only.
What impressed me most of the winery, was the fact that the riddling of the numerous bottles  has done completely by hand for 20 days, 4 times a day ! !

At the end of the visit, a "sparkling" wine tasting, with some typical snacks of the place, allowed us to discover the best products and the different flavors born in this area.

Our journey continues with the flavors of the cuisine, where we had a delicious lunch with some traditional dishes  of Brescia, cooked by mom Daniela. Simply amazing.
Strongly undecided between the courses to choose, we indeed decided to take a tris of pasta: chestnuts tagliatelle with gorgonzola cream and walnuts; casoncelli (a kind of ravioli, typical of this area) filled with bagòss (a cheese of this zone) and bigoli with lard and pecorino cheese.
We then moved on to the main course, with a fantastic mixed grill, the donkey with polenta and the famous beef in oil. All amazing.
Since we had not had enough . . . we decided to take the desserts as well. The homemade cherries pies and the delicious eggnog, made us finally satisfied.


We said goodbye to "Al Rocol" buying some bottles and with the belly and the palate more than satisfied! A simply delicious, as well as very interesting, experience !
Here are the contacts.

Agriturismo Al Rocol
Via Provinciale 79 - 25050 Ome (BS)
Tel/Fax 030.6852542 - info@alrocol.com
http://www.alrocol.com

Our trip didn't finish here. In fact, we took advantage of the beautiful sunny day to take a short jump to Iseo, on the shore of the famous Lake.
For the ones who wish so, they can also take a tour of the lake by ferry and make a stop on the largest lake island in Europe, "Monte Isola".
 
Stay tuned
XOXO
Beatrice B.
 

giovedì 30 gennaio 2014

Light, ma con gusto! Pane rustico al latte e cacao - Light, not tasteless! Cocoa and milk bread

Tenere d'occhio la bilancia è tipico di ogni donna (ma perchè gli uomini si fanno sempre meno problemi?), però, dopo settimane di insalatine e pollo, uno potrebbe anche, come dire, "rompersi" un po'... Ma chi l'ha deciso che stare a dieta deve essere per forza doloroso?
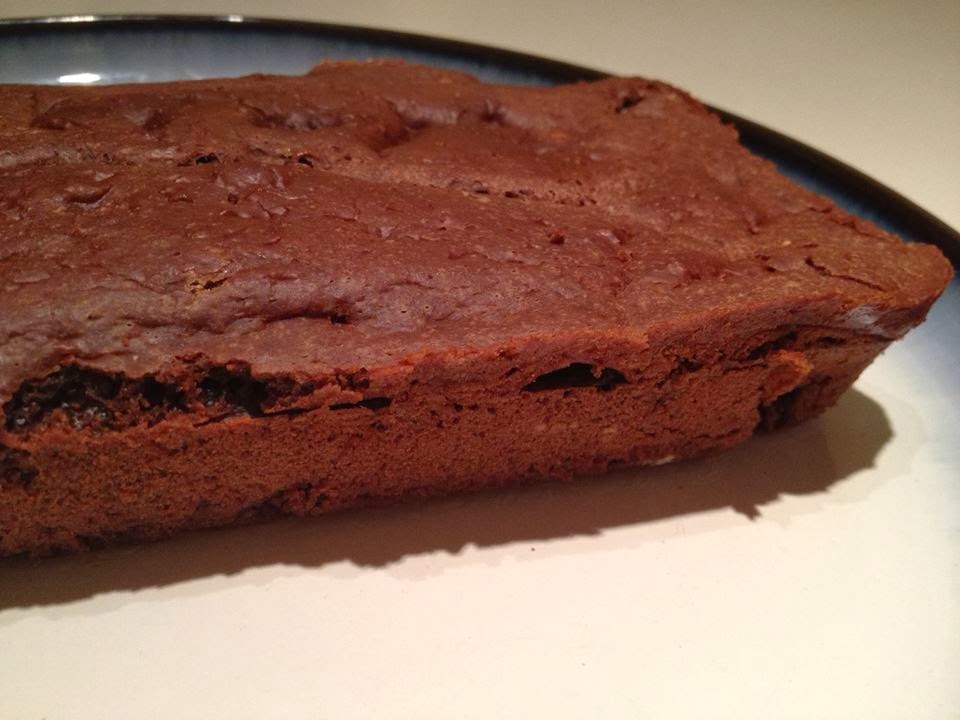
Oggi vi propongo una ricetta light ma buonissima: Pane rustico al latte e cacao.
E' leggera perché non contiene né burro né uova, inoltre è semplicissima e molto veloce da preparare.
In realtà la ricetta è nata un po' per caso...Ieri sera avevo una gran voglia di cucinare una torta o simile, ma di uova in casa nemmeno l'ombra, così mi sono arrangiata ed è venuto fuori un risultato inaspettato!
Il latte infatti rende questo dolce particolarmente soffice e spugnoso, una vera delizia!
Ecco qua la ricetta:

Ingredienti

-200 g di farina 00
-100 g di zucchero
-300 ml di latte
-1 bustina di lievito per dolci
-2 cucchiai di cacao in polvere

Procedimento

Prendiamo una terrina, versiamoci dentro il latte e, mescolando con un mestolo e in maniera graduale per evitare di creare grumi, la farina, il lievito e il cacao. Per un risultato sicuro consiglio sempre di passare gli ingredienti al setaccio. Aggiungiamo infine lo zucchero e mescoliamo per bene fino ad ottenere un composto omogeneo.

Prendiamo dunque una casseruola da forno rettangolare coi bordi piuttosto alti, la imburriamo e vi versiamo dentro il composto. Poniamo il tutto in forno a 160° per una mezz'oretta abbondante. Consiglio di fare comunque la prova dello stuzzicadenti, per essere sicuri che sia pronto.

Ed ecco il nostro pane latte e cacao pronto! Semplice no?


E' Ideale da consumare per colazione o merenda, magari con miele o marmellata spalmati sopra, ma anche semplicemente da solo.


Spero abbiate voglia di provarlo anche voi. Come avete visto ci vuole veramente poco tempo!

Baci e alla prossima!
Beatrice B.


Women are obsessed with diet (why men aren't?), but after weeks of salads and chicken only, you could just get enought... We really need to ask to ourselves: "Why do I have to suffer so much for a bloody diet?" Simply, you don't.
Today I want to propose a light but delicious recipe: Milk and Cocoa Bread
It is light because it contains no butter or eggs and it is also very easy and quick to bake. 
Actually this recipe was born perchance ... Last night I had a great desire to bake a cake or a sort of...but since I didn't have any eggs in my fridge and I was too lazy to go out and buy them, I decided to try and  ... I got an unexpected result! 
The milk makes this bread particularly sweet, soft and spongy, just a delight! 
Here's the recipe:

Ingredients 

-200 g of white flour 
-100 g of sugar 
-300 ml of milk 
-1 tablespoon of baking powder 
-2 tablespoons of cocoa powder

Procedure 

Take a bowl, throw in the milk and stir with a wooden spoon adding in flour, baking powder and cocoa in a gradual manner in order to avoid lumps. Then, add the sugar and mix well until you get a smooth mixture.

Take a rectangular baking pan with high edges, butter it and throw in the mixture. Then, place it in the oven at 160 degrees for about half an hour.

And the bread is ready! It's so simple, isn't it?

Lovely for breakfast or as a snack. Try it with honey or jam smeared over. Simply amazing!

Hope you will try it at home. It's just so simple and fast!

Stay tuned
XOXO
Beatrice B.


martedì 14 gennaio 2014

Oggi . . . torta cioccolato e cocco ! - Chocolate and coconut cake !


In Irlanda del Nord, purtroppo, piove molto spesso . . . non è certo una novità. Durante queste giornate umide e buie per me non c'è niente di meglio che preparare una bella torta. Anche se probabilmente tutta la vostra fatica verrà divorata in 10 minuti dall'orda di coinquilini costantemente affamati, penso ne valga sempre la pena. Così, questa mattina ho scavato un po' nella dispensa per trovare l'ispirazione e ho deciso di cucinare una delle mie torte preferite in assoluto: la torta cioccolato e cocco.
Vorrei condividerne la ricetta con voi, siccome è un dolce per il quale da sempre vado matta e che amo gustare sia a colazione sia per merenda, davanti ad una fumante tazza di latte o tè.

Ecco di seguito gli ingredienti per circa 5/6 persone:

- 150 g di farina 00
- 170 g di farina di cocco 
(120 per l'impasto e 50 per decorare)
- 150 g di burro
- 150 g di zucchero 
- 80 g di cacao in polvere
- 40 g di scaglie di cioccolato
- 4 uova
- 1/2 bicchiere di latte fresco
- 1 bustina di lievito
- 1 pizzico di sale

Una volta preparati tutti gli ingredienti, cominciamo con il procedimento vero e proprio:

Come prima cosa bisogna prendere le nostre uova e separare i tuorli dagli albumi. Quest'ultimi vanno poi montati a neve e messi momentaneamente da parte. Dopo di che prendiamo i nostri tuorli, li mettiamo in una terrina piuttosto capiente dove li amalgamiamo bene con lo zucchero, fino a quando non otterremo un composto piuttosto compatto.

Dopo di che,  aggiungiamo anche il burro precedentemente sciolto a bagnomaria o in microonde.
In seguito aggiungiamo in maniera graduale il lievito, la farina e il cacao in polvere. Setacciarli potrà aiutare ad evitare eventuali grumi.

Un poco alla volta, aggiungiamo poi anche il latte, la farina di cocco, gli albumi precedentemente montati a neve, le scaglie di e un pizzico di sale.

Una volta ottenuto un impasto ben omogeneo e cremoso, versiamolo in una tortiera precedentemente imburrata (consiglio sempre quelle con il bordo smontabile a molla)  e inforniamolo nel forno a 180° per 40-45 minuti circa.

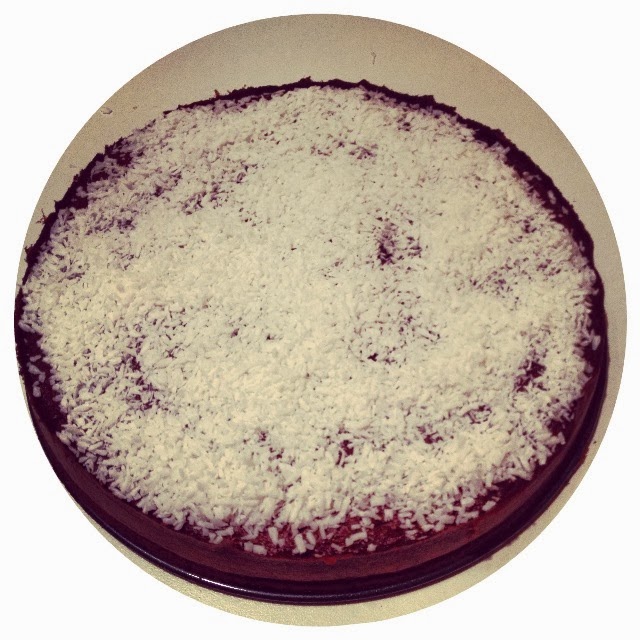
Una volta estratta dal forno, prima che si raffreddi, cospargiamo le scaglie di cocco restanti, e volendo anche qualche di cioccolata, in maniera uniforme. Dopo di ciò, lasciamo raffreddare e . . . la torta è pronta per essere servita!


Spero avrete voglia di provarla a casa a farmi sapere come vi è riuscita

Baci Baci e alla prossima!
Beatrice B.


In Northern Ireland, unfortunately, it rains very often  . . . and this is certainly not a news. During these days, for me there's nothing better than cooking a nice cake. Although probably all your hard work will disappear in 10 minutes because of the greedy and constantly hungry housemates , I think it's always worth it. So, this morning I decided to cook one of my absolute favorite cake: the chocolate and coconut one.
I would like to share the recipe with you, as it is a dessert which I've always been crazy for and which I love to have for breakfast or for a snack, maybe with a steaming cup of milk or tea.

Here are the ingredients for about 5/6 persons:

- 150 g of white flour 
- 170 g of coconut flour (120 for the mixture and 50 to decorate)
- 150 g of butter
- 150 g of white sugar
- 80 g of cocoa powder
- 40 g of chocolate chips
- 4 eggs
- 1/2 cup of fresh milk
- 1 packet of yeast
- 1 pinch of salt

Then, the procedure:

At first, you have to take the eggs and separate the yolks from the whites. Then, whisk the whites and put them aside. After that, take the egg yolks and put them in a bowl where you have to mix them well with sugar, to get a compact mixture.

After that, add the butter, previously melted in a double boiler or in the microwave.
Later on, gradually add the baking powder, the flour and the cocoa powder with the sieve, in order to avoid any lumps.
Then, add the milk, the coconut flour, egg whites previously whisked and a pinch of salt.

Once you get a blended and creamy mixture, throw it in a buttered cake pan (I always recommend the ones with the removable rim) and put it inside the oven at 180 degrees for 40-45 minutes.

Once removed from the oven, when it's still warm, sprinkle the left coconut flakes, and, if you wish, some chocolate chips as well, in a uniform way. After that, let it cool down and then serve it!

I really hope you'll be fancy to try this at home and to let me know your opinion. Have a good day and see you!

XOXO
Beatrice B.